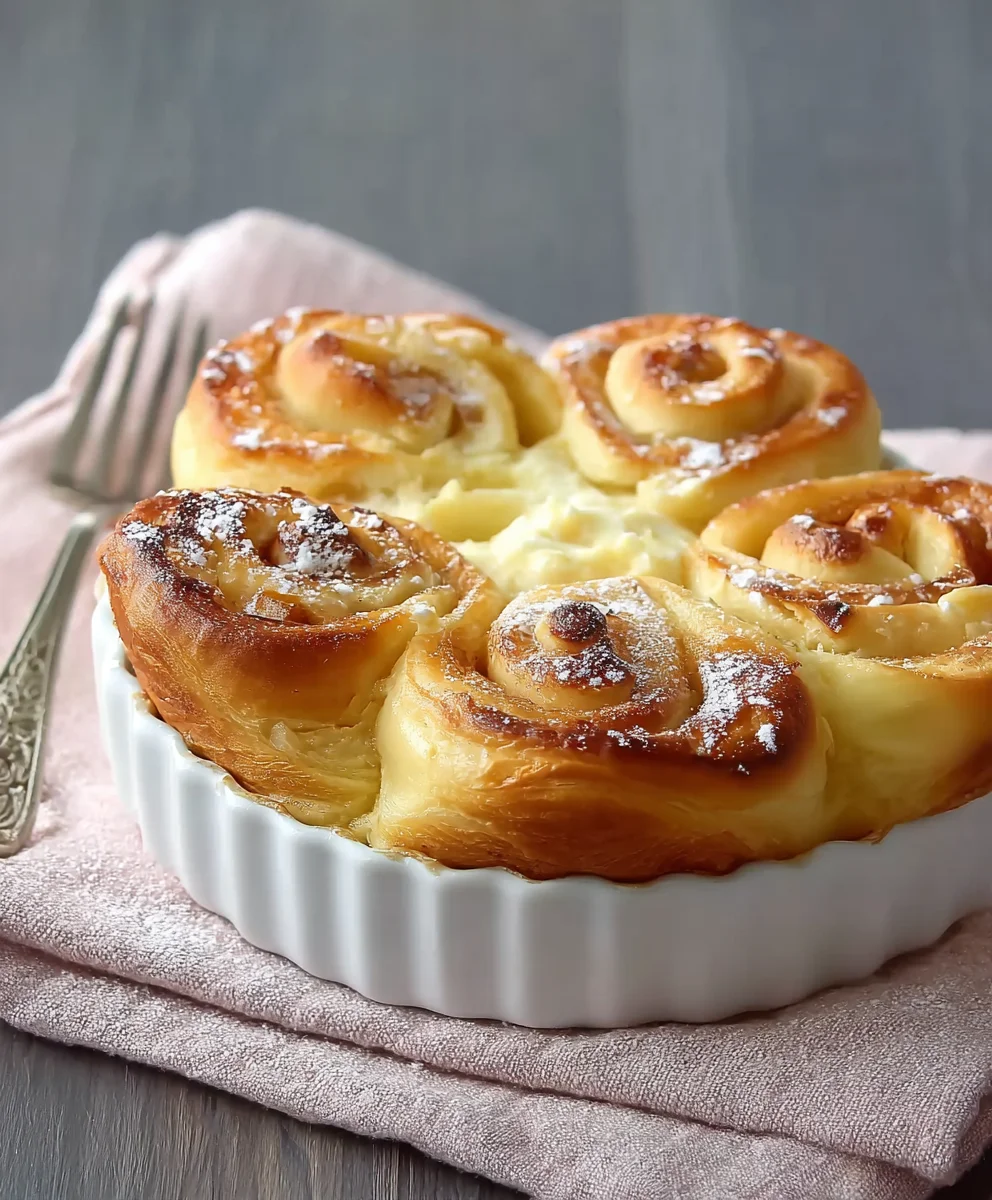
Puddingschnecken Unglaublich Cremig Das Ultimative Rezept Fur… isn’t just a collection of words; it’s a promise of pure, unadulterated delight that will transport your senses straight to a cozy German bakery. As an avid baker, I’m absolutely thrilled to share with you my definitive take on these beloved sweet rolls, a true culinary embrace that has captivated hearts across Germany and beyond for generations. Imagine: a tender, pillowy yeast dough, lovingly coiled around a generous swirl of velvety smooth, intensely flavorful vanilla pudding, baked to golden perfection, and often finished with a delicate glaze. It’s the comforting aroma that fills your kitchen, the anticipation as you watch them rise, and the first magical bite that truly makes these a sensation.
Hailing from the rich tradition of German and Austrian pastry arts, Puddingschnecken are a testament to the simple joys of home baking, often gracing coffee tables on lazy Sunday afternoons or serving as a delightful treat for fika with friends. Their enduring popularity lies in that irresistible contrast: the light, slightly sweet dough providing the perfect counterpoint to the rich, creamy filling. It’s a texture symphony, a taste sensation that evokes nostalgia and creates new cherished memories with every single piece. I understand the pursuit of perfection, and if you’ve been on a quest for what truly embodies the essence of Puddingschnecken Unglaublich Cremig Das Ultimative Rezept Fur, rest assured, you’ve arrived at your destination.
This isn’t merely a recipe; it’s an invitation to experience baking bliss, yielding rolls that are not just incredibly creamy, but also wonderfully light and bursting with flavor. I am confident that my carefully honed method will guide you to create the most astonishingly delicious Puddingschnecken you’ve ever tasted.
Ingredients:
- For the incredibly soft yeast dough:
- 500g (about 4 cups) all-purpose flour, plus extra for dusting
- 75g (about 1/3 cup) granulated sugar
- 1 packet (7g or 2 1/4 teaspoons) active dry yeast
- 1/2 teaspoon salt
- 250ml (about 1 cup) lukewarm full-fat milk
- 75g (about 1/3 cup) unsalted butter, melted and cooled slightly
- 1 large egg, at room temperature
- Zest of 1/2 organic lemon (optional, but adds a wonderful subtle freshness)
- For the unbelievably creamy vanilla pudding filling:
- 750ml (about 3 cups) full-fat milk
- 100g (about 1/2 cup) granulated sugar
- 2 packets (about 80g or 2/3 cup) vanilla pudding powder (cornstarch-based, usually found in German specialty stores, or use 60g cornstarch + 2 tsp vanilla extract or seeds from 1 vanilla bean)
- 50g (about 1/4 cup) unsalted butter, cut into small pieces
- 1 tablespoon vanilla extract (if not using vanilla bean or vanilla pudding powder)
- For the simple glaze (optional, but highly recommended):
- 150g (about 1 1/4 cups) powdered sugar
- 2-3 tablespoons milk or lemon juice (for a brighter tang)
Preparing the Ultra-Soft Yeast Dough
Creating the perfect yeast dough is the foundation for our incredible Puddingschnecken. This process requires a little patience, but trust me, the soft, fluffy results are absolutely worth every minute.
- Activate the Yeast: In a medium bowl, combine the lukewarm milk (it should feel warm, not hot, to the touch – around 100-110°F or 38-43°C), one teaspoon of the granulated sugar, and the active dry yeast. Give it a gentle stir and let it sit for about 5-10 minutes. You’ll know your yeast is alive and happy when a foamy layer forms on the surface. This little foam cap is a sign of good things to come, indicating that your yeast is active and ready to make your dough rise beautifully.
- Combine Dry Ingredients: In a large mixing bowl (or the bowl of your stand mixer fitted with the dough hook attachment), whisk together the flour, the remaining granulated sugar, and the salt. Make sure these are well combined. Creating a small well in the center of the flour mixture is a good practice; it’s where we’ll pour our wet ingredients.
- Add Wet Ingredients: Once your yeast mixture is foamy, pour it into the well of the dry ingredients. Add the slightly cooled melted butter, the room temperature egg, and the lemon zest (if you’re using it – and I highly recommend it for that subtle lift of flavor).
- Knead the Dough: This is where the magic truly begins.
- By Stand Mixer: If you’re using a stand mixer, start on low speed until the ingredients just come together, forming a shaggy dough. Then increase the speed to medium-low and knead for a full 8-10 minutes. This extensive kneading is crucial for developing the gluten, which will give our Puddingschnecken their wonderfully soft and elastic texture. The dough should become smooth, pliable, and elastic, pulling away from the sides of the bowl.
- By Hand: If kneading by hand, turn the dough out onto a lightly floured surface. Knead vigorously for about 12-15 minutes. At first, it will be sticky and messy, but as you continue to push, fold, and stretch the dough, it will transform. It will become less sticky, more elastic, and take on a smooth, satiny appearance. A good test is the “windowpane test”: you should be able to gently stretch a small piece of dough thin enough to see light through it without it tearing.
- First Rise (Bulk Fermentation): Form the kneaded dough into a neat ball. Lightly grease the mixing bowl with a little bit of oil (or the butter wrapper works perfectly). Place the dough ball into the greased bowl, turning it once to coat lightly with oil. Cover the bowl tightly with plastic wrap or a clean kitchen towel. Place it in a warm, draft-free place to rise. This could be a slightly warm oven (turned off!), near a sunny window, or just on your kitchen counter on a warm day. Let it rise for about 1 to 1.5 hours, or until it has visibly doubled in size. This first rise is essential for flavor development and achieving that characteristic light texture.
Crafting the Unbelievably Creamy Vanilla Pudding Filling
The “cremig” in Puddingschnecken Unglaublich Cremig truly comes to life with this filling. Forget thin, watery puddings; we’re aiming for a lush, rich, and utterly irresistible vanilla dream that holds its shape beautifully and melts in your mouth.
- Prepare the Pudding Slurry: In a small bowl, whisk together the vanilla pudding powder (or cornstarch) with about 100ml (approximately 1/2 cup) of the cold milk from the total amount. Whisk until there are no lumps and you have a smooth, thin paste. If you’re using vanilla extract, you can add it here, or later with the butter. If using a vanilla bean, split it lengthwise and scrape out the seeds.
- Heat the Milk: Pour the remaining 650ml (about 2.5 cups) of milk into a medium saucepan. Add the granulated sugar and the scraped vanilla bean seeds (if using, add the pod too for extra flavor, removing it before cooling). Heat the milk over medium heat, stirring occasionally, until it just comes to a simmer. Be careful not to let it boil over or scorch at the bottom. A good trick is to use a heavy-bottomed saucepan to distribute heat more evenly.
- Thicken the Pudding: Once the milk is simmering, remove the vanilla pod (if used). Give your pudding slurry another quick whisk, then slowly pour it into the hot milk in a steady stream, whisking constantly and vigorously. Continue to whisk over medium heat for 1-2 minutes until the pudding thickens considerably and starts to bubble. It should be very thick – much thicker than a typical drinking pudding. This ensures it won’t seep out of your Schnecken during baking.
- Add Butter and Vanilla: Remove the saucepan from the heat. Immediately stir in the small pieces of unsalted butter until they are completely melted and incorporated, making the pudding extra smooth and glossy. If you’re using vanilla extract, add it now. The butter contributes significantly to the “unglaublich cremig” texture we’re aiming for, adding richness and a luxurious mouthfeel.
- Cool the Pudding: This step is critical! Pour the hot pudding into a clean bowl. To prevent a “skin” from forming on top (which can be lumpy and unappealing), immediately place a piece of plastic wrap directly onto the surface of the hot pudding, pressing it down so it touches the entire surface. Allow the pudding to cool completely to room temperature, and then ideally chill it in the refrigerator for at least 1-2 hours, or until firm. A completely cold and firm pudding is much easier to spread and will hold its shape better within the dough.
Assembling Your Puddingschnecken
Now that our dough is risen and our pudding is perfectly chilled, it’s time to bring everything together to form those delightful spirals. This stage is where the Puddingschnecken truly take their iconic shape.
- Punch Down and Roll Out the Dough: Once your dough has doubled in size after its first rise, gently punch it down to release the air. This makes it easier to work with. Lightly flour a clean work surface. Turn the dough out onto the floured surface and using a rolling pin, roll it into a large rectangle. Aim for dimensions of approximately 50×40 cm (about 20×16 inches) and a thickness of about 3-4mm (about 1/8 inch). Try to keep the edges as straight as possible, as this will help you create neat spirals.
- Spread the Pudding Filling: Remove your chilled vanilla pudding from the refrigerator. Give it a good stir to loosen it up and make it smooth again. Evenly spread the entire pudding filling over the rolled-out dough, leaving a clear border of about 1-2 cm (1/2 to 3/4 inch) along one of the longer edges. This border is important because it will act as a seal when you roll the dough, ensuring the pudding stays neatly tucked inside. Don’t be shy with the pudding – spread it generously for that truly creamy experience.
- Roll Up the Dough: Starting from the longer edge opposite the border you left, carefully and tightly roll up the dough into a log. Take your time to roll it as snugly as possible, maintaining even pressure across the entire length. A tight roll ensures beautiful, defined swirls in your Puddingschnecken and prevents the filling from escaping. Once you reach the un-filled edge, gently pinch the seam closed along the entire length to seal the log.
- Cut the Schnecken: Now for the fun part – cutting! For perfectly shaped Schnecken, you have a couple of options:
- With a Sharp Knife: Use a very sharp, un-serrated knife. Gently slice the log into pieces approximately 2-2.5 cm (about 3/4 to 1 inch) thick. It helps to flour the knife lightly between cuts to prevent sticking.
- With Dental Floss (Pro Tip!): This is my preferred method for clean cuts! Slide a piece of unflavored dental floss (about 30cm or 12 inches long) under the log. Cross the ends over the top of the log at your desired cutting point and pull them taut in opposite directions. The floss will slice through the dough cleanly without squashing it. Repeat for all the slices.
- Arrange for Second Rise: Line two large baking sheets with parchment paper. Carefully transfer the cut Schnecken onto the prepared baking sheets, leaving a good amount of space between each one (about 3-4 cm or 1.5 inches), as they will expand significantly during the second rise and baking.
- Second Rise (Proofing): Cover the baking sheets loosely with plastic wrap or clean kitchen towels. Place them in a warm, draft-free spot for another 30-45 minutes. During this second rise, the Schnecken will puff up beautifully, becoming noticeably larger and even softer. This final proofing ensures a light and airy texture in the finished product.
Baking the Golden Puddingschnecken
The aroma that fills your kitchen during this stage is truly heavenly! Baking these beauties to a perfect golden brown will give them an irresistible crust while keeping the interior incredibly soft.
- Preheat Oven: About 15 minutes before the second rise is complete, preheat your oven to 180°C (350°F). Make sure your oven rack is in the middle position for even baking.
- Bake to Perfection: Place the baking sheets with the risen Puddingschnecken into the preheated oven. Bake for 18-25 minutes, or until the Schnecken are beautifully golden brown on top and around the edges. Keep an eye on them, as oven temperatures can vary. If you notice them browning too quickly, you can loosely tent them with aluminum foil for the last few minutes. The rich golden color indicates they are cooked through and have developed a delicious crust.
- Cool Slightly: Once baked, remove the Schnecken from the oven. Let them cool on the baking sheets for about 5-10 minutes before carefully transferring them to a wire rack to cool completely. This slight cooling period on the tray helps them firm up a little before handling. While they are tempting to eat immediately, letting them cool a bit allows the pudding to set further and the dough to become perfectly tender.
Optional: The Irresistible Glaze
While delicious on their own, a simple, sweet glaze adds a beautiful sheen and an extra layer of sweetness that perfectly complements the creamy pudding and soft dough. It’s the crowning touch for our “ultimative” Puddingschnecken!
- Prepare the Glaze: In a small bowl, whisk together the powdered sugar with 2 tablespoons of milk or lemon juice. Start with 2 tablespoons and add more, half a teaspoon at a time, until you achieve a smooth, pourable, but still relatively thick consistency. You want it to be opaque and coat the back of a spoon, not too runny. If it’s too thick, add a tiny bit more liquid; if too thin, whisk in a little more powdered sugar.
- Glaze the Schnecken: Once the Puddingschnecken have cooled down significantly (they should still be slightly warm, but not hot – this allows the glaze to set nicely without melting completely), drizzle or spread the glaze generously over each one. You can use a spoon for a rustic drizzle or a pastry brush for a more even coating.
- Allow Glaze to Set: Let the glazed Puddingschnecken sit on the wire rack for about 10-15 minutes, or until the glaze has set and hardened slightly. This makes them less sticky and easier to handle.
Your Puddingschnecken Unglaublich Cremig Das Ultimative Rezept Fur (incredibly creamy pudding snails, the ultimate recipe for) are now ready to be enjoyed! They are truly best on the day they are made, while the dough is at its softest and the pudding is still wonderfully tender. Enjoy every single bite of these homemade delights!

Conclusion:
Why This Recipe is an Absolute Must-Try
So there you have it! We’ve journeyed together through the delightful steps to create something truly special. This isn’t just any ordinary treat; it’s a testament to simple, wholesome ingredients coming together to form pure magic in your kitchen. What sets this recipe apart, making it an absolute must-try for anyone with a sweet tooth or a craving for comforting baked goods, is its undeniable texture and flavor profile. This is truly the Puddingschnecken Unglaublich Cremig Das Ultimative Rezept Fur an unparalleled delightful experience, a dessert that manages to be simultaneously light and rich, with a melt-in-your-mouth quality that is simply beyond compare. It’s the kind of comfort food that wraps you in a warm, sweet embrace with every single bite, making any day feel a little more special. The detailed, easy-to-follow instructions ensure that even if you consider yourself a novice baker, you’ll achieve perfect, bakery-worthy results, transforming your kitchen into a haven of sweet, irresistible aromas. Trust me when I say, once you taste these glorious Puddingschnecken, you’ll understand why I’m so incredibly passionate about them. They deliver on every promise of a truly indulgent, deeply satisfying culinary experience, leaving you longing for more.
Elevate Your Experience: Serving Suggestions and Creative Variations
Perfect Serving Ideas:
Now that you’ve mastered the art of crafting these delightful swirls of joy, let’s explore how to truly elevate your experience and savor them to the fullest. These Puddingschnecken are incredibly versatile, fitting seamlessly into various occasions. They are, of course, absolutely divine on their own, perhaps still slightly warm from the oven, allowing that incredibly creamy filling to truly shine and melt delicately on your tongue. Imagine savoring one with your morning coffee, turning a regular start to the day into a luxurious, café-style moment of bliss. Or, serve them as a charming and comforting afternoon treat with a fragrant cup of tea, providing a perfect accompaniment to a quiet moment of reflection or a friendly chat. For a more elaborate dessert presentation, consider plating them artfully with a delicate dusting of confectioners’ sugar, a generous dollop of freshly whipped cream, or even a scoop of premium vanilla bean ice cream. The delightful contrast between the warm, tender pastry and the cold, smooth ice cream is simply heavenly, creating a symphony of temperatures and textures that will enchant your taste buds.
Unleash Your Creativity with Variations:
But why stop there? The true beauty of home baking lies in the joy of experimentation and personalizing recipes to suit your unique tastes! While the classic vanilla pudding filling we’ve used is undeniably spectacular and a crowd-pleaser, don’t hesitate to explore a world of other pudding flavors. Think rich chocolate pudding for a deeper, more decadent Puddingschnecken experience, or perhaps a bright lemon pudding for a tangy, refreshing twist that perfectly balances the sweetness. You could even swirl in some luscious fruit preserves, like vibrant raspberry or sweet apricot, into the pudding mixture before rolling the dough, adding another wonderful layer of flavor and intriguing texture to each bite. A sprinkle of finely chopped, toasted nuts (almonds or pecans work wonderfully) on top before baking, or even gently folded into the filling, can introduce a delightful crunch that complements the soft pastry. For the glaze, a simple confectioners’ sugar and milk glaze is traditional and always a hit, but a zesty lemon glaze, a rich chocolate ganache drizzle, or even a warm maple glaze could transform the flavor profile entirely, offering endless possibilities. Don’t be afraid to make these Puddingschnecken truly your own; that’s where the real fun and culinary discovery begin!
Your Turn to Bake and Share!
So, I sincerely implore you, gather your ingredients, set aside a joyful afternoon, and immerse yourself in the wonderfully rewarding process of baking these incredible Puddingschnecken. You’ll be magnificently rewarded with not just a supremely delicious treat, but also the immense satisfaction and pride that comes from creating something truly wonderful with your own hands. There’s a unique, heartwarming kind of happiness that emanates from pulling a tray of perfectly golden, irresistibly fragrant pastries from the oven, and I truly, truly want you to experience that moment. Once you’ve taken that first glorious bite and undoubtedly fallen deeply in love with these creamy delights, I would absolutely love to hear all about your experience! Please don’t keep your culinary triumphs to yourself. Share photos of your beautifully baked Puddingschnecken on your favorite social media platforms. Tell me about your favorite variations, your ingenious serving suggestions, or any clever little tips and tricks you discovered along the way during your baking adventure. Your feedback, creative ideas, and shared passion genuinely inspire me, and it helps our wonderful baking community grow and thrive. Tag me, or use a specific hashtag (if I had one, I’d lovingly suggest #MyPerfectPuddingschnecken or #CreamyPuddingSwirls) so I can easily see and celebrate your successes, big or small. This recipe isn’t just about diligently following instructions; it’s profoundly about igniting your passion for baking, nurturing your creativity, and most importantly, sharing that pure joy with others. Happy baking, my dear friends!
Puddingschnecken Unglaublich Cremig Das Ultimative Rezept Fur (Incredibly Creamy Pudding Swirls)
Experience baking bliss with these incredibly creamy Puddingschnecken, tender yeast rolls filled with a rich, velvety vanilla pudding, baked to golden perfection, and optionally finished with a delicate glaze. A true German pastry delight that evokes nostalgia and creates cherished memories.
Ingredients
-
500g all-purpose flour
-
75g granulated sugar (for dough)
-
1 packet (7g) active dry yeast
-
1/2 teaspoon salt
-
250ml lukewarm full-fat milk (for dough)
-
75g unsalted butter, melted, cooled
-
1 large egg, room temperature
-
Zest of 1/2 organic lemon (optional)
-
750ml full-fat milk (for filling)
-
100g granulated sugar (for filling)
-
2 packets (80g) vanilla pudding powder (or 60g cornstarch + 2 tsp vanilla extract/1 vanilla bean)
-
50g unsalted butter, cut into small pieces (for filling)
-
1 tablespoon vanilla extract (if not using powder/bean)
-
150g powdered sugar (for glaze)
-
2-3 tablespoons milk or lemon juice (for glaze)
Instructions
-
Step 1
Activate yeast: Combine 250ml lukewarm milk, 1 tsp sugar, and yeast; let foam (5-10 min). In a large bowl, whisk 500g flour, remaining 75g sugar, and salt. Add foamy yeast mix, 75g melted butter, 1 egg, and lemon zest. Knead by mixer (8-10 min) or hand (12-15 min) until smooth and elastic. Form dough into a ball, lightly grease bowl, cover, and let rise 1-1.5 hours in a warm place until doubled. -
Step 2
Whisk 80g pudding powder (or cornstarch) with 100ml cold milk. In a saucepan, heat remaining 650ml milk, 100g sugar, and vanilla (if using bean, remove pod) until simmering. Whisk in slurry; cook 1-2 min over medium heat until very thick. Remove from heat, stir in 50g butter and vanilla extract (if used). Pour into a bowl, cover directly with plastic wrap, and chill 1-2 hours until firm. -
Step 3
Punch down risen dough and roll into a 50×40 cm (20×16 in) rectangle, about 3-4mm thick. Stir chilled pudding and spread evenly over dough, leaving a 1-2 cm border on one long edge. Tightly roll dough into a log, pinching seam closed. Slice log into 2-2.5 cm thick pieces using a sharp knife or dental floss. -
Step 4
Place cut Schnecken on parchment-lined baking sheets, spaced apart. Cover loosely and let rise 30-45 minutes in a warm place until puffed. -
Step 5
Preheat oven to 180°C (350°F). Bake Schnecken for 18-25 minutes until beautifully golden brown. Cool on sheets for 5-10 minutes, then transfer to a wire rack to cool completely. -
Step 6
Whisk 150g powdered sugar with 2-3 tbsp milk or lemon juice until smooth and pourable. Drizzle or spread glaze generously over slightly warm, cooled Schnecken. Let glaze set for 10-15 minutes on the wire rack before serving.
Important Information
Nutrition Facts (Per Serving)
It is important to consider this information as approximate and not to use it as definitive health advice.
Allergy Information
Please check ingredients for potential allergens and consult a health professional if in doubt.